Difference between revisions of "RFID NFC car access"
(Created page with "{{Project |Featured=No |State=Active |Members=Vicarious |Description=Use an RFID/NFC tag to unlock my car. |Picture=Car_access.jpg }} Physical keys can be copied, damaged, for...") |
m (fixed collapsible content) |
||
| Line 21: | Line 21: | ||
I recommend the xM1+ implant because it allows the UID number to be changed, thanks to the "Chinese Magic Backdoor" feature. This is similar to regularly changing your PIN codes and passphrases but without actually having to replace implants. | I recommend the xM1+ implant because it allows the UID number to be changed, thanks to the "Chinese Magic Backdoor" feature. This is similar to regularly changing your PIN codes and passphrases but without actually having to replace implants. | ||
| + | <div class="mw-collapsible mw-collapsed" id="mw-customcollapsible-car_access_ino"> | ||
==== Car_access.ino ==== | ==== Car_access.ino ==== | ||
| − | <div class="mw-customtoggle- | + | <div class="mw-customtoggle-car_access_ino mw-code">Click here to view the source code</div> |
<pre class="mw-collapsible-content"> | <pre class="mw-collapsible-content"> | ||
#include <Wire.h> | #include <Wire.h> | ||
Latest revision as of 03:54, 30 July 2018
| Project: RFID NFC car access | |
|---|---|
| Featured: | No |
| State | Active |
| Members | Vicarious |
| GitHub | No GitHub project defined. Add your project here. |
| Description | Use an RFID/NFC tag to unlock my car. |
| Picture | |

| |
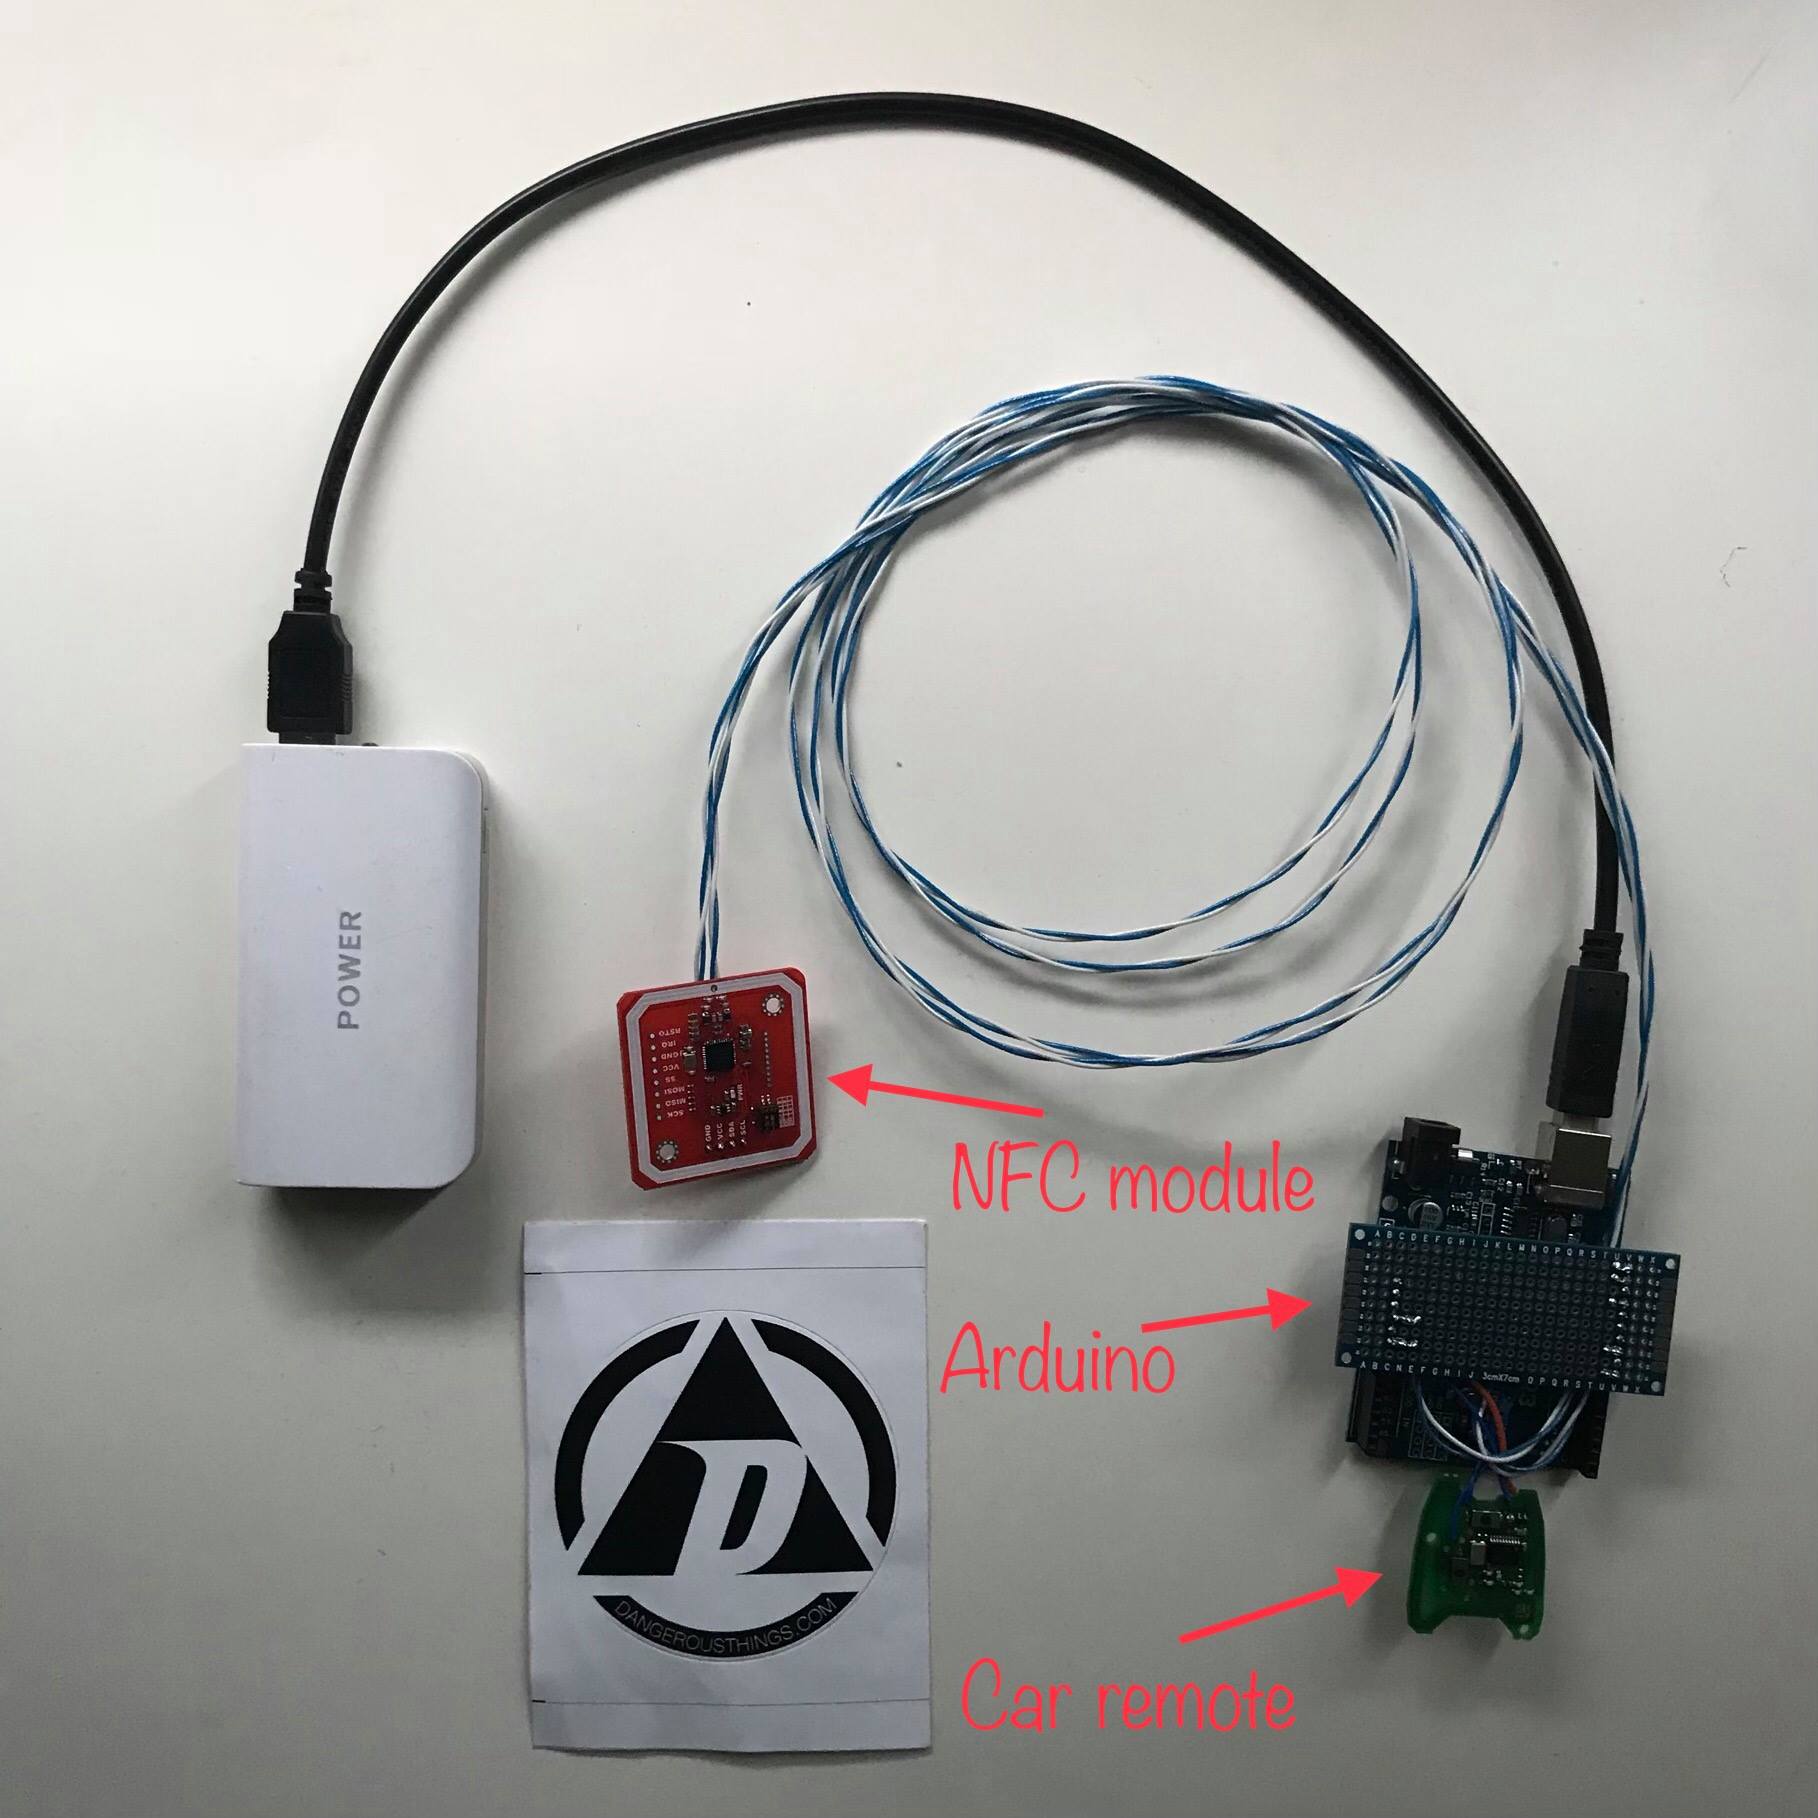
Physical keys can be copied, damaged, forgotten, lost, stolen, etc. After finishing this project, I can use my flexNT or xNT RFID/NFC tag implants to unlock the car doors.
Requirements
- Car with central door locking
- Car keys with remote
- Arduino Uno or similar
- PN532 NFC module
- Mobile power bank, USB 5V
Step 1. Prepare the Arduino
- Launch the Arduino IDE. Create a new sketch, copy/paste the following code.
- Replace the example 4 and 7 byte UID numbers with the UID numbers of your own implants.
I recommend the xM1+ implant because it allows the UID number to be changed, thanks to the "Chinese Magic Backdoor" feature. This is similar to regularly changing your PIN codes and passphrases but without actually having to replace implants.
Car_access.ino
Click here to view the source code
#include <Wire.h>
#include <PN532_I2C.h>
#include <PN532.h>
#include <NfcAdapter.h>

PN532_I2C pn532_i2c(Wire);
NfcAdapter nfc = NfcAdapter(pn532_i2c);
String uid = "0";
const int openPin = 8;     // GPIO open button pin
const int closePin = 10;     // GPIO close button pin

// variables will change:
int doorState = 0;         // variable for the door status

void setup(void) {
  pinMode(openPin, INPUT);
  pinMode(closePin, INPUT);
  Serial.begin(115200);
  Serial.println("NDEF Reader");
  nfc.begin();
}

void loop(void) {
  Serial.println("\nScan a NFC tag\n");
  if (nfc.tagPresent())
  {
    NfcTag tag = nfc.read(); // Read the RFID/NFC tag
    uid = tag.getUidString(); // Get UID from the tag and save it in variable "uid"
    Serial.println(uid); // Display the UID of the scanned RFID/NFC tag
    if ((uid == "04 01 23 42 AB CD EF") || (uid == "DE AD BE EF")) {
      if (doorState == 0) {
        Serial.println("open");
        digitalWrite(openPin, LOW);
        pinMode(openPin, OUTPUT);
        delay(500);
        pinMode(openPin, INPUT);
        doorState = 1;
        delay(500); //makes sure the command isn't repeated
      }
      else if (doorState == 1) {
        Serial.println("close");
        digitalWrite(closePin, LOW);
        pinMode(closePin, OUTPUT);
        delay(500);
        pinMode(closePin, INPUT);
        doorState = 0;
        delay(500); //makes sure the command isn't repeated
      }
    }
  }
}
- Attach the PN532 NFC module and PCB from the car remote to a proto PCB